You’ll start off with two inboxes, Important and Other, but you can create as many as you’d like. All open items appear in exactly one inbox.
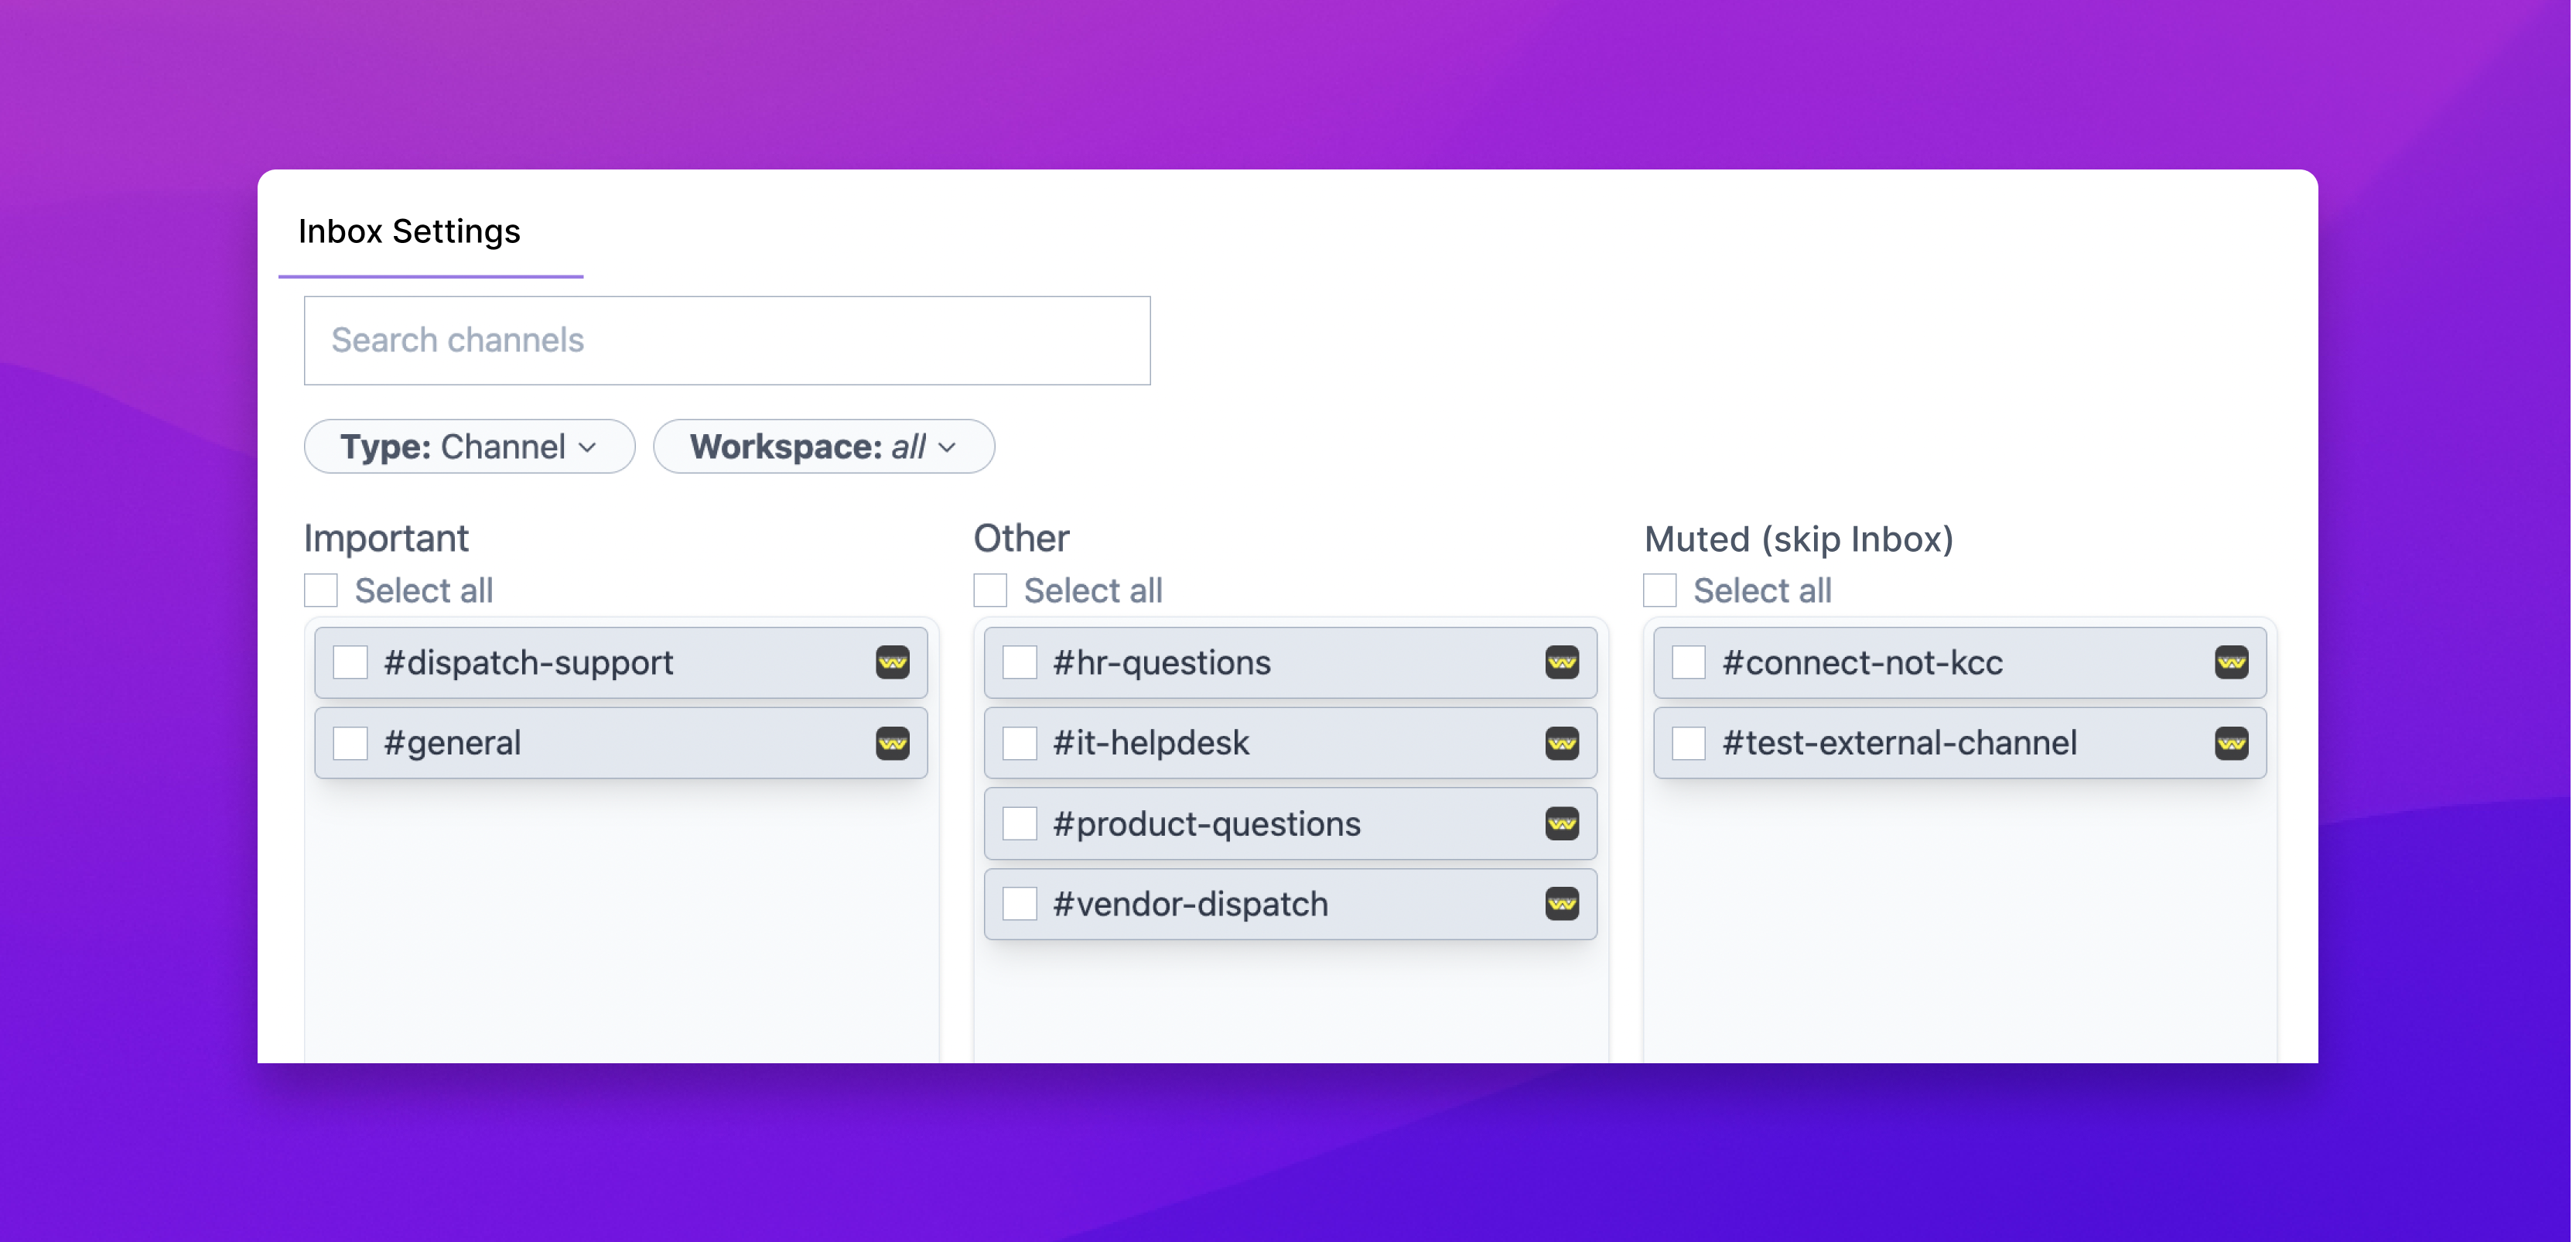
Every channel has a Default Inbox where messages from that channel will go.
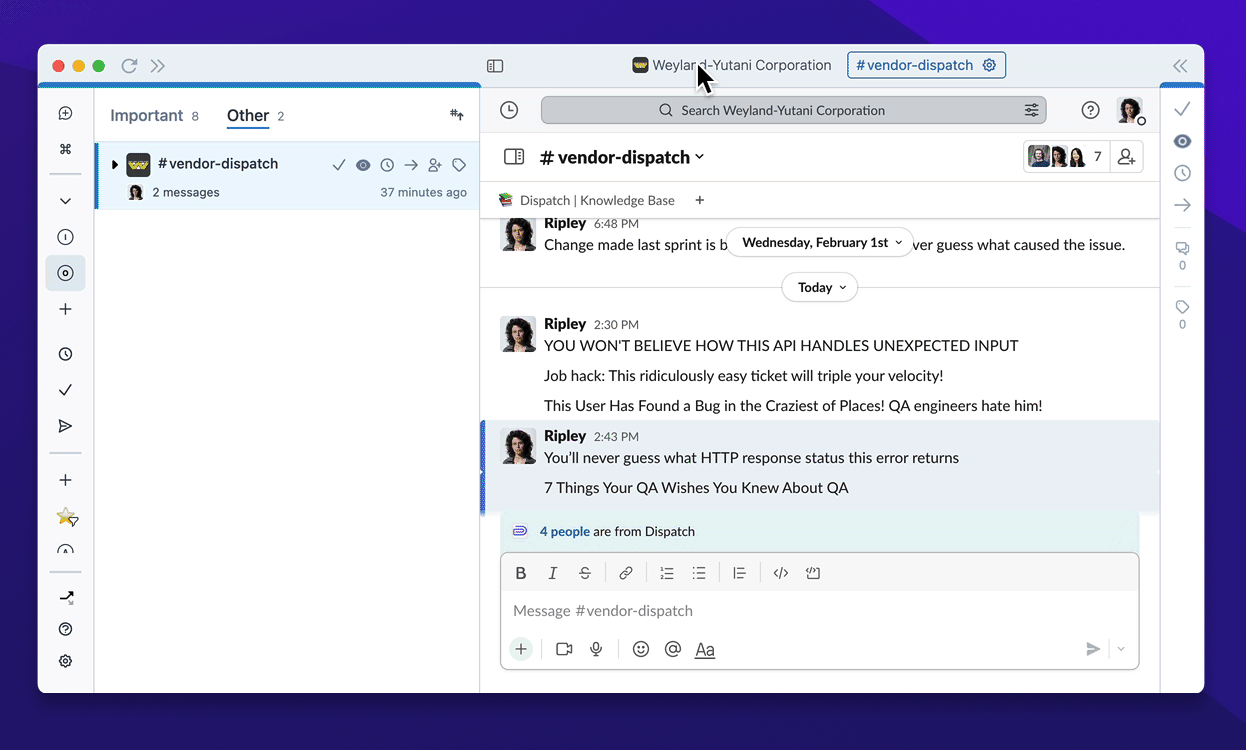
Here’s how you can easily update a channel’s Default Inbox from ![]() Other to
Other to ![]() Important.
Important.
You can also bulk update Default Inboxes from the Rules page.
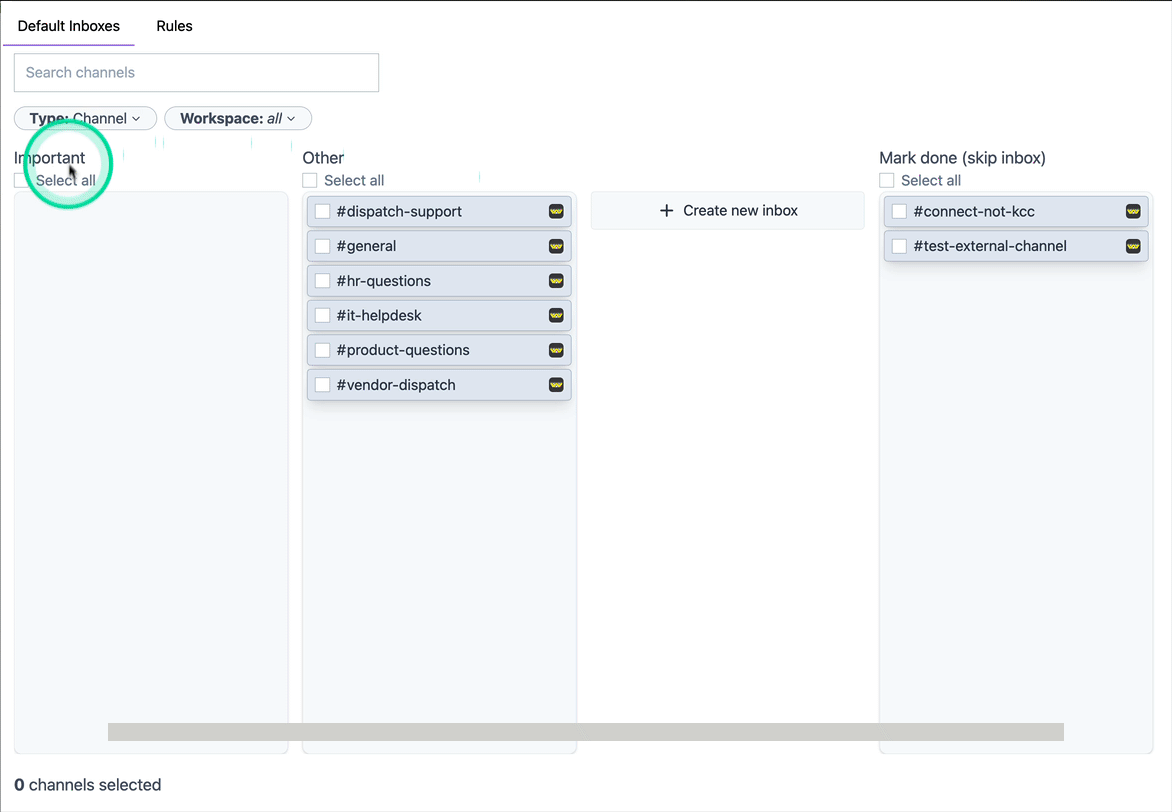
In the bottom-left, click this icon to open the Rules page. Here you can bulk update which #channel messages appear in which inboxes.
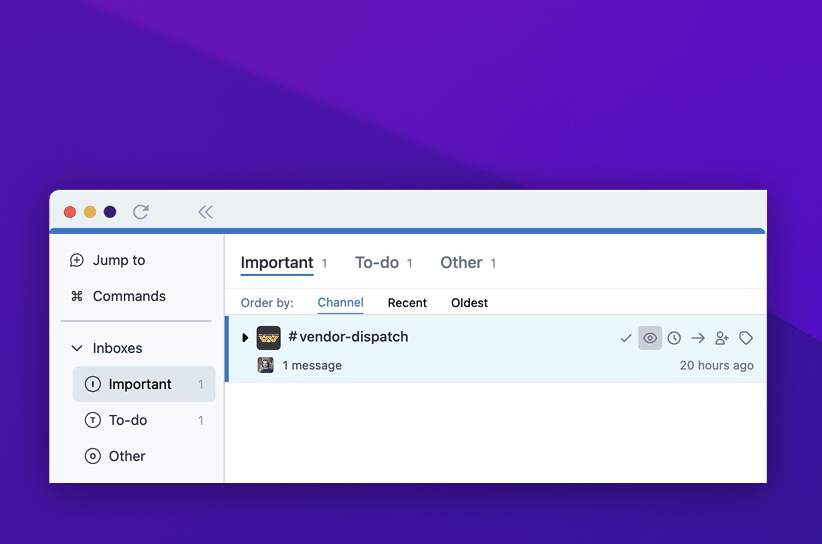
There are various ways to switch inbox views:
Create a new inbox with the “+ New Inbox” button in the sidebar.
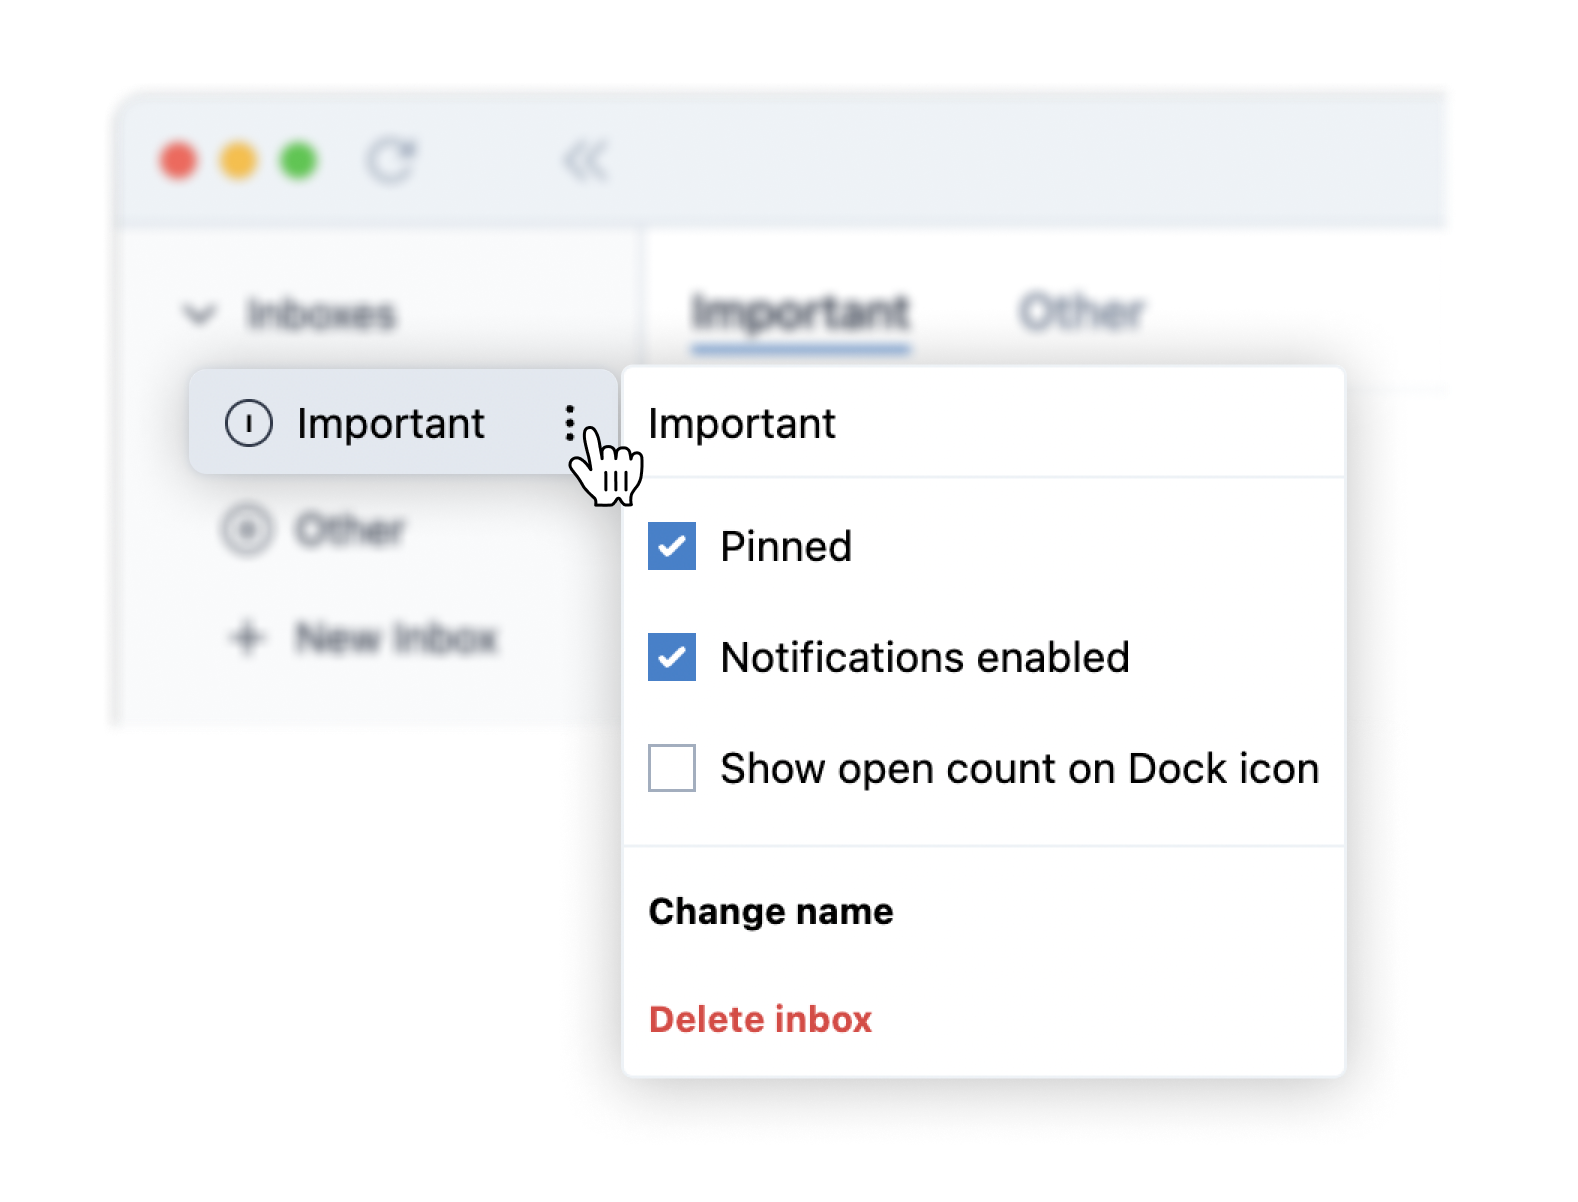
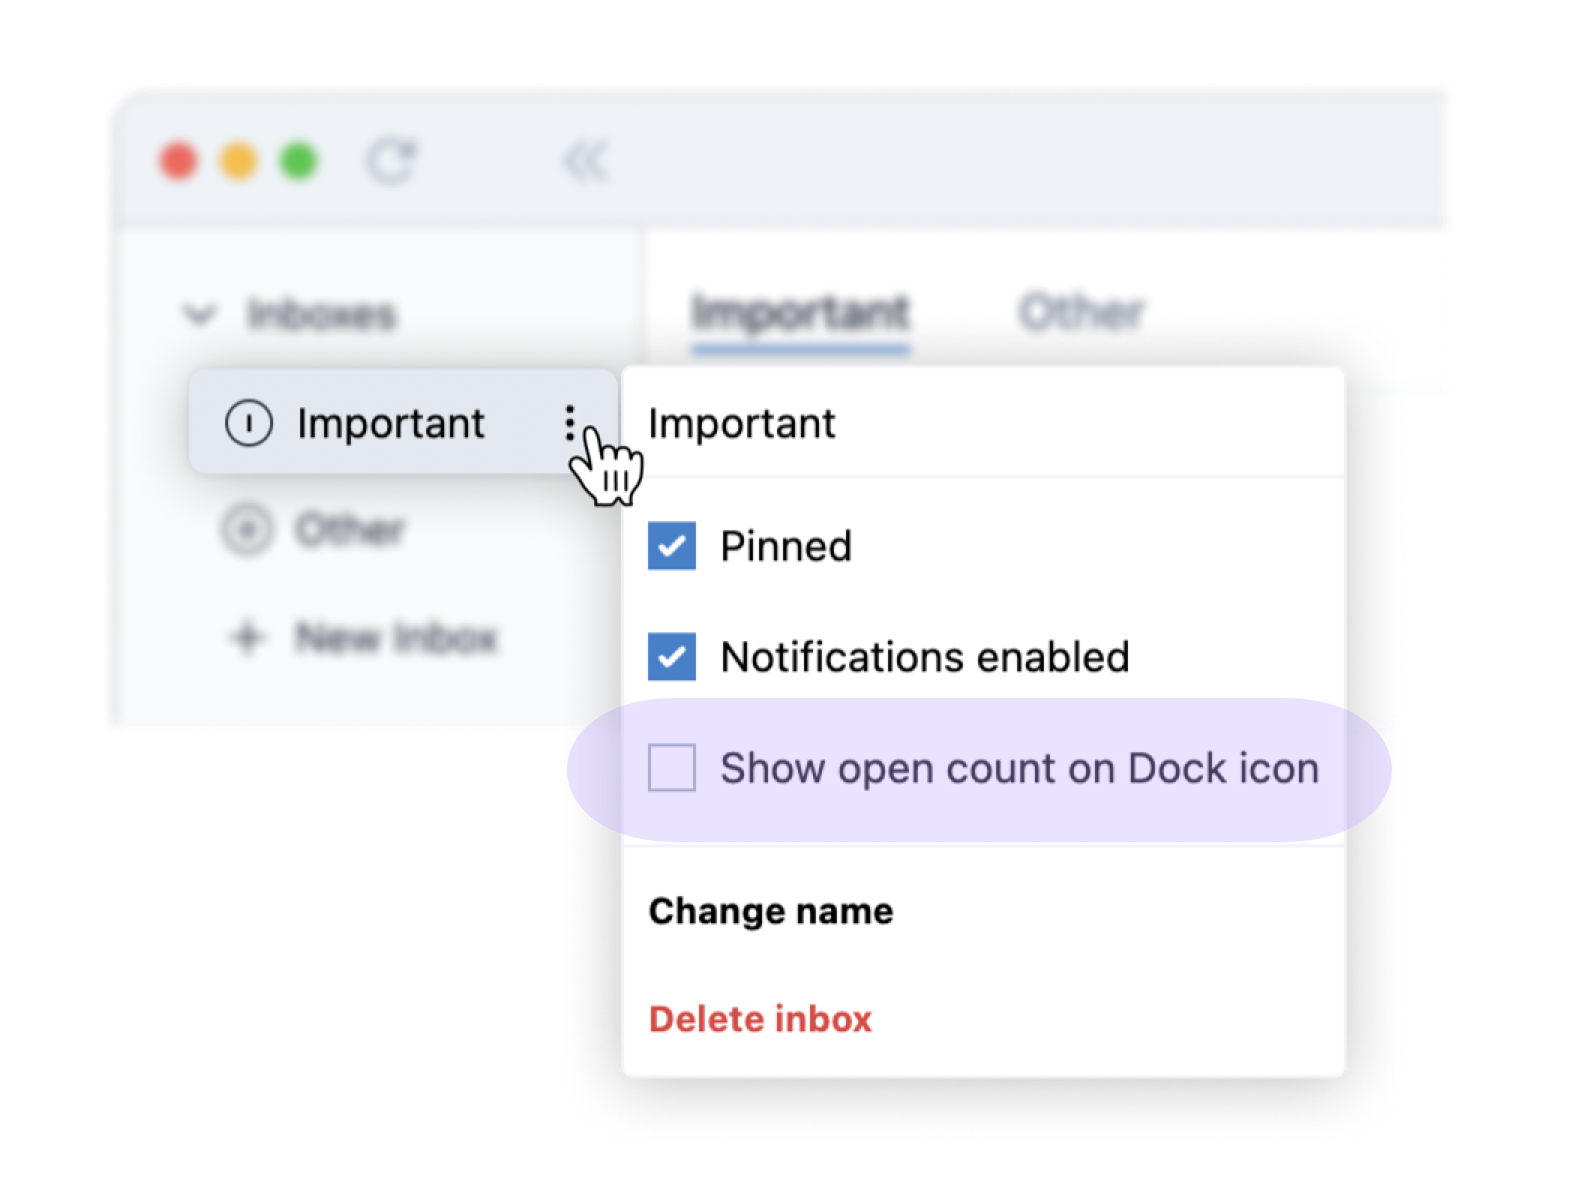
Edit or delete the inbox by hovering over it in the sidebar, clicking the ellipsis button, and choosing an option.
You'll be notified of any message that appears in your Important inbox. You can turn notifications on or off for any inbox. Hover over the inbox in the sidebar and click the ellipsis button and toggle “Notifications enabled”.
🔔 You can change the notification sound on the Settings page.
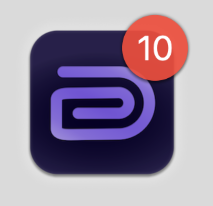
The number of items in your Important inbox will show up as a red badge on the Dispatch icon in the Dock.
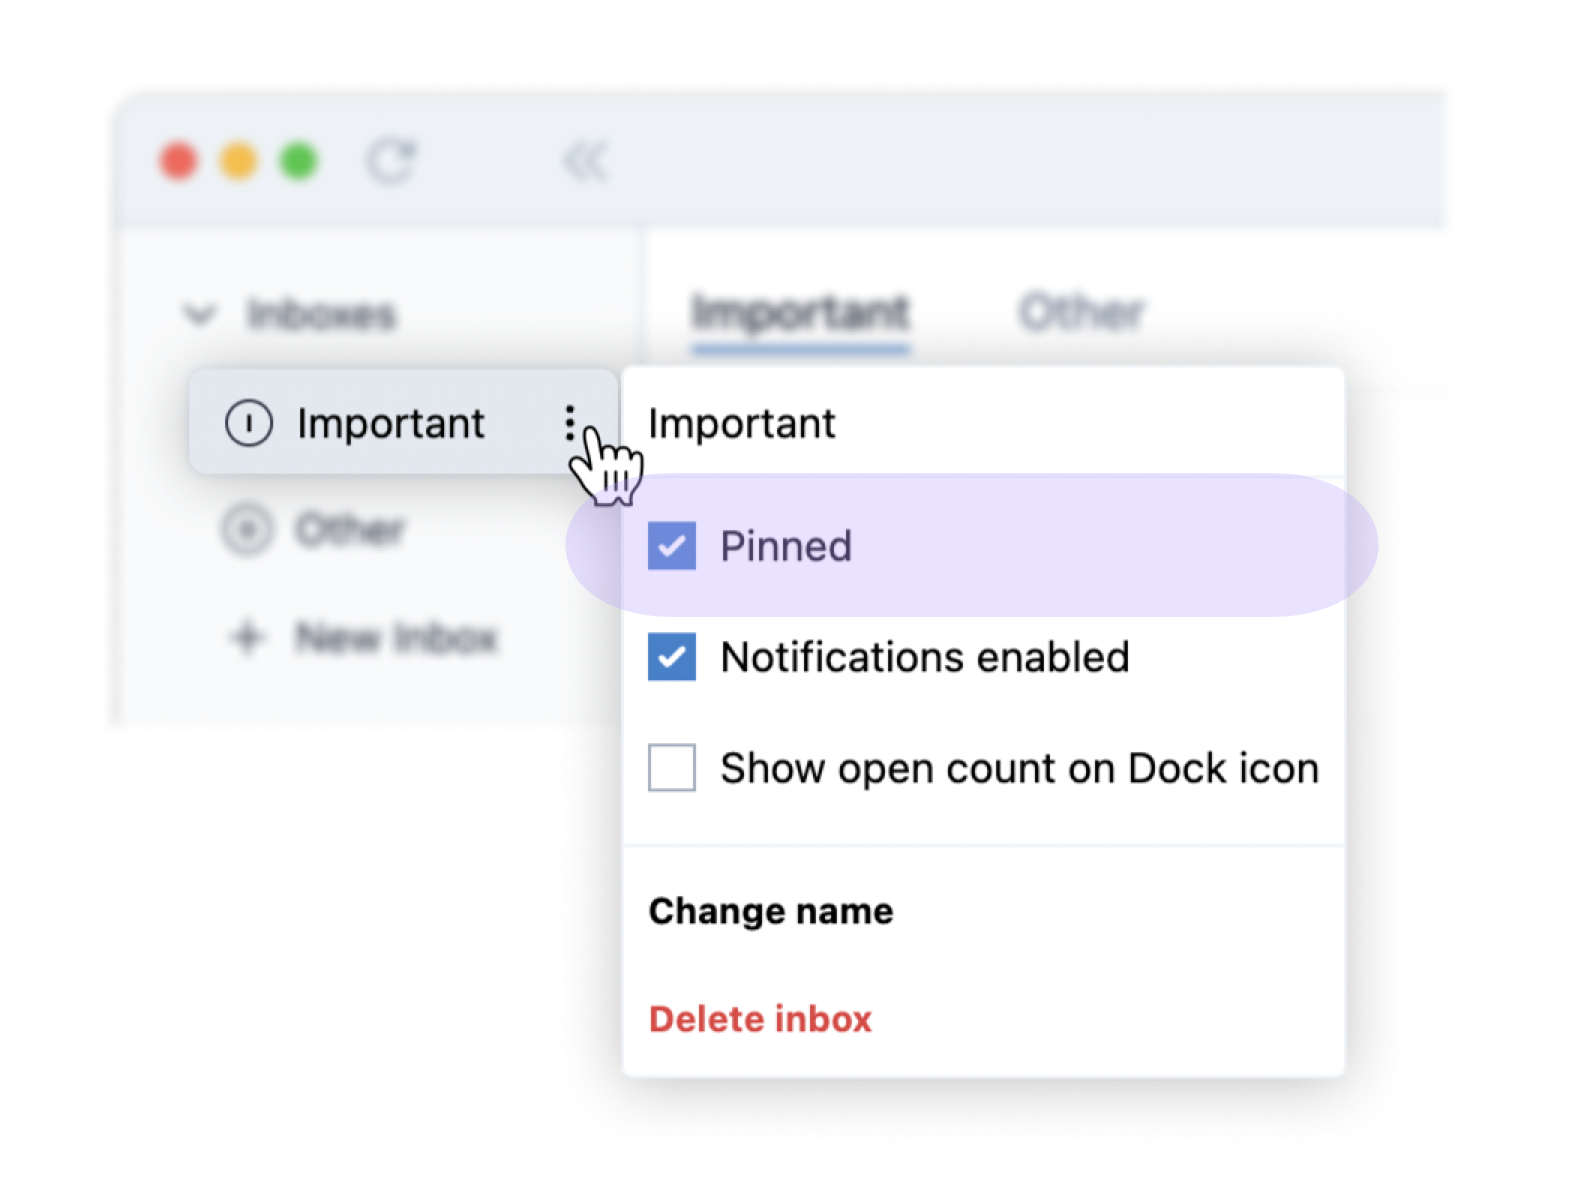
Inboxes are pinned by default, which means they show up at the top of your inbox. You can unpin them here.
Click and drag inboxes to reorder them.
Every channel has a Default Inbox where messages from that channel will go.
Here’s how you can easily update a channel’s Default Inbox from ![]() Other to
Other to ![]() Important.
Important.
Learn more about Default Inbox Settings

